> For the complete documentation index, see [llms.txt](https://help.gan.ai/llms.txt). Markdown versions of documentation pages are available by appending `.md` to page URLs; this page is available as [Markdown](https://help.gan.ai/getting-started-onboarding/our-products/stock-templates.md).
# Stock Templates
Gan.AI’s AI Avatars let you produce realistic, on-camera presenters using just a script. Customize avatars, edit scenes, add elements, change backgrounds, and render high-quality videos effortlessly.
**What exactly is an AI Avatar?**
An AI Avatar is a lifelike digital version of a real person that can speak, move, and express emotions using artificial intelligence. It reads your text or script aloud with realistic lip-sync and gestures — creating human-like videos without the need for cameras or live recording.
**Your AI Avatar Awaits: Quick and Fun Creation Steps**
**Access the Avatars page**
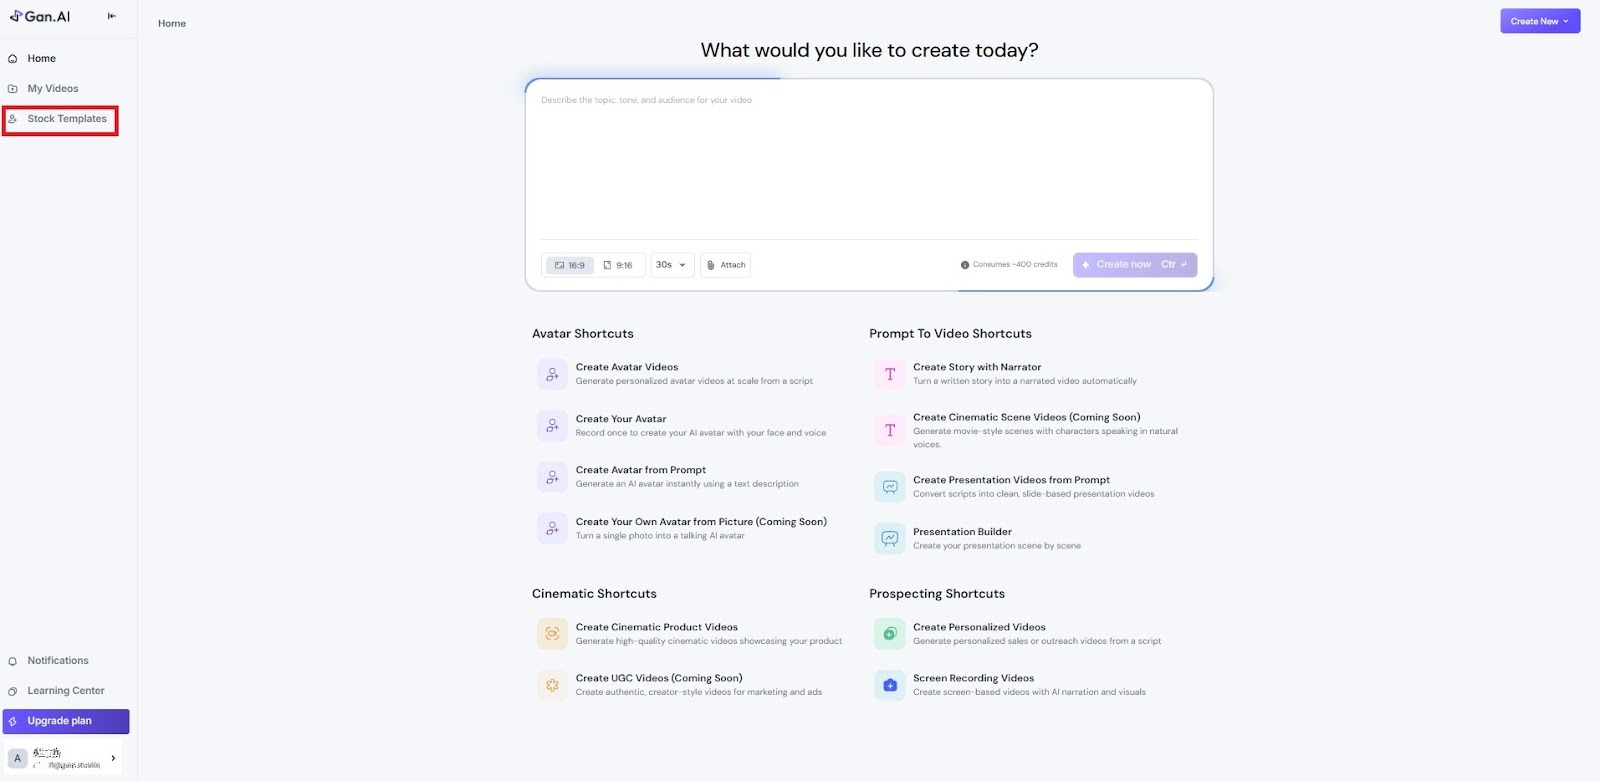
To [create an AI avatar,](https://www.gan.ai/create-your-free-realistic-ai-avatar-generator-maker-online) log in to your Gan.AI account and click on the Avatar option under the sidebar navigation menu.
**Choose a Stock Template**
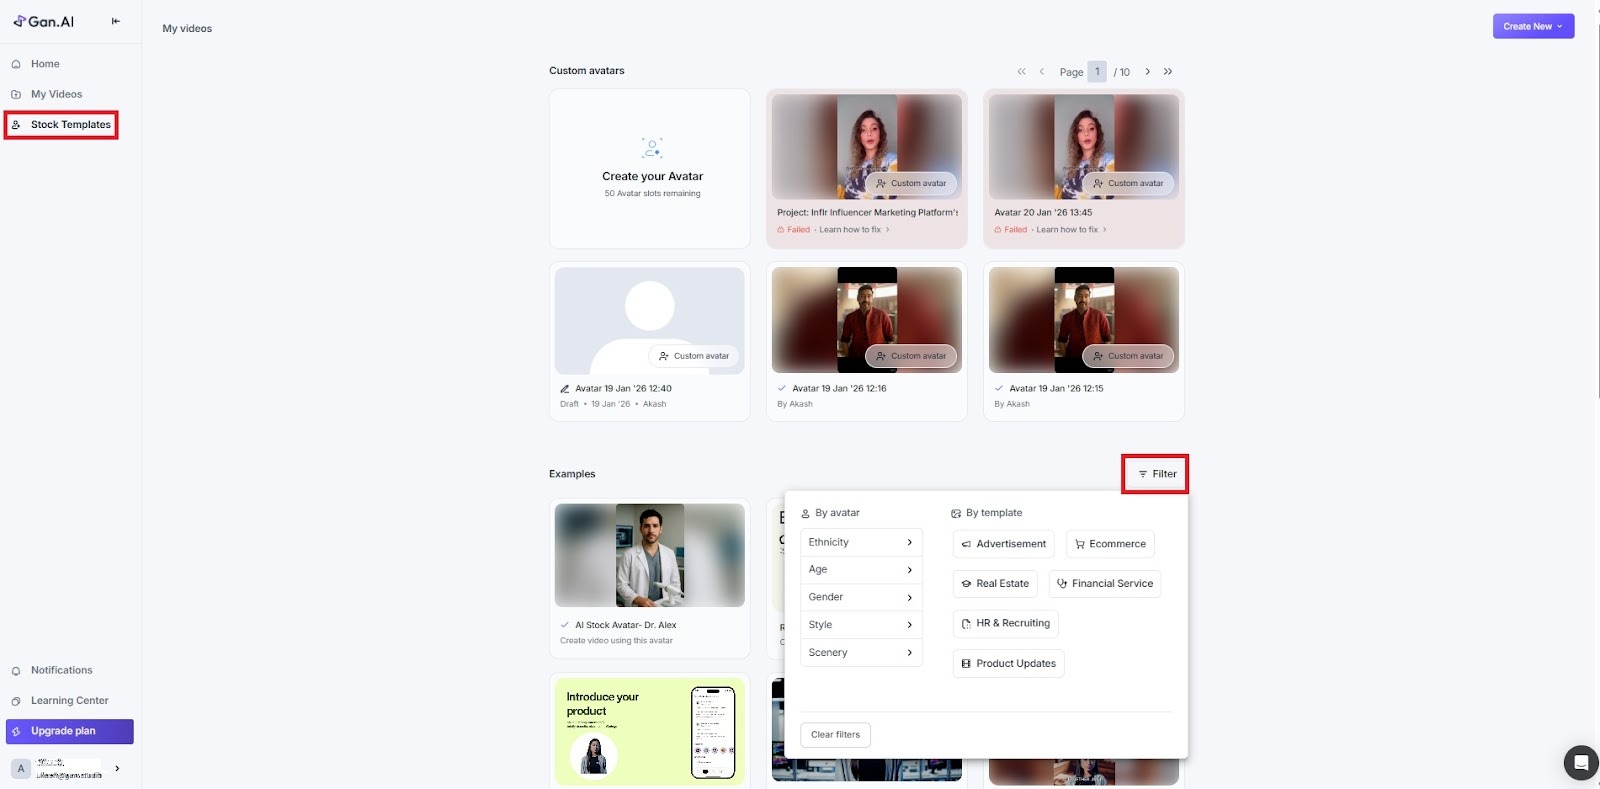
After selecting "**Stock Templates**," you’re taken to a gallery displaying 40 AI avatars under the "**Examples**" section, each suited for diverse professional needs. The "**Filter**" option enables you to categorize avatars by attributes such as gender, style, or context, making it easy to find the ideal avatar for your video project. Simply apply your desired filter and click to select.
#### Gan.AI AI Avatar Template - Complete Guide
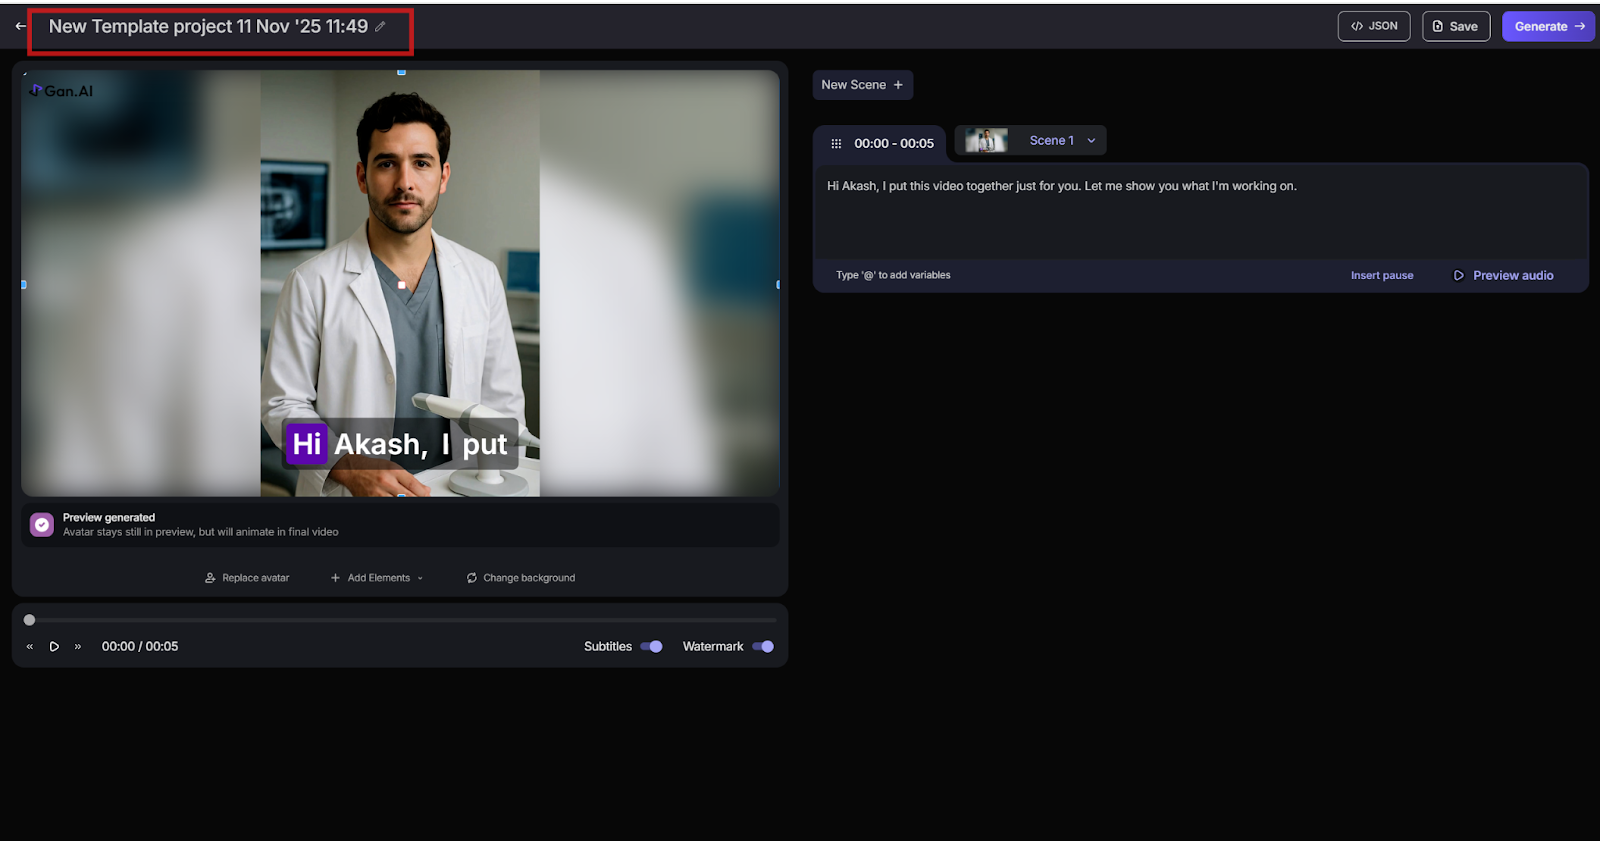
**Project Title Bar**
At the very top of the screen, you can set or edit the project title for your video. Simply by clicking the pencil ✏️ to rename it anytime for easier tracking.
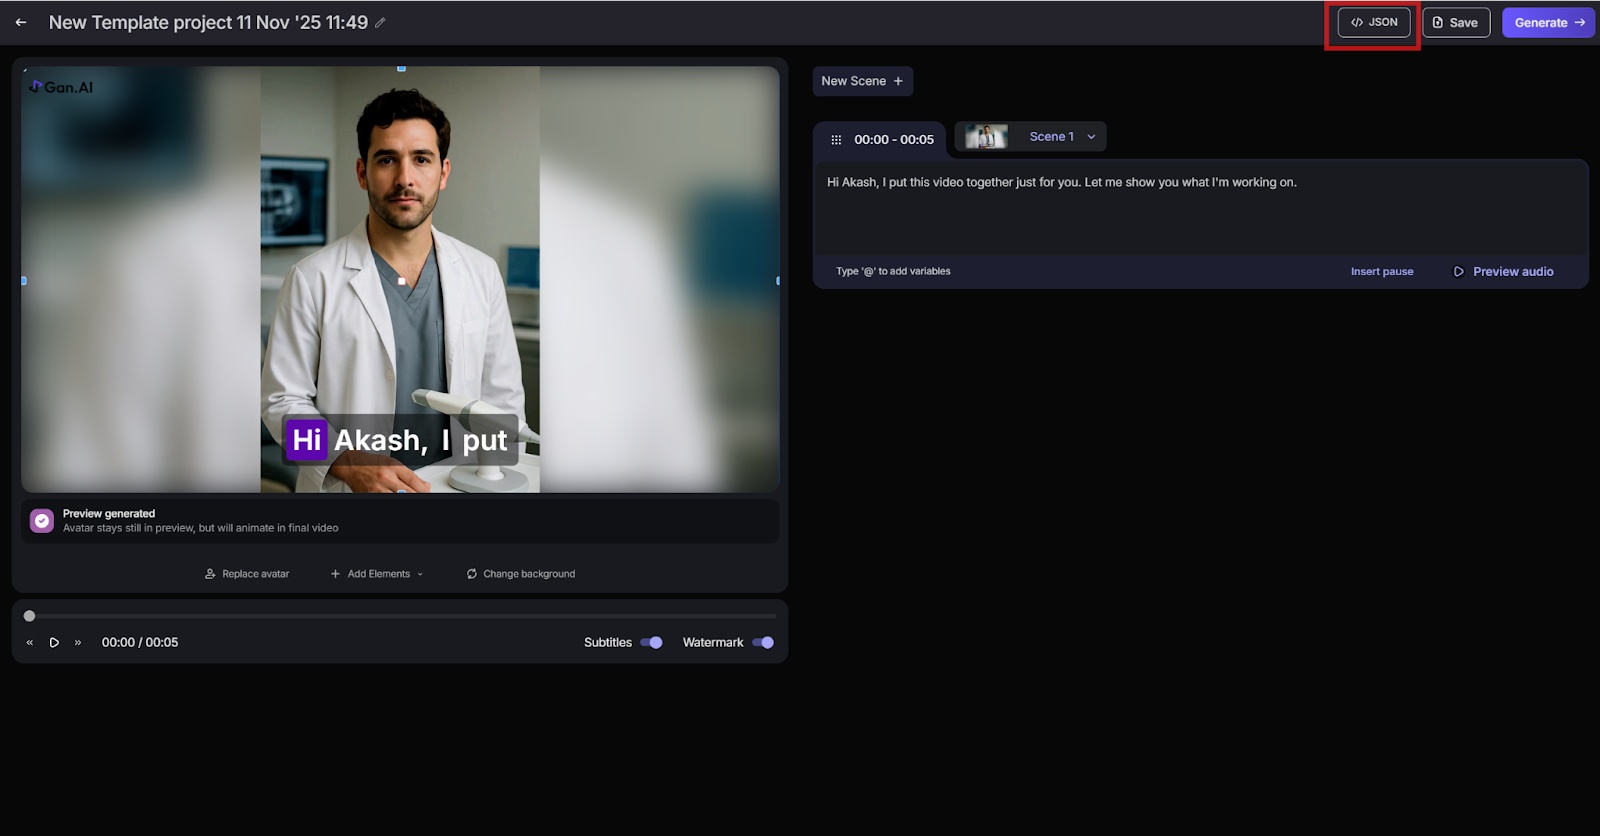
**JSON Button (\)**
Let's developers view or export the technical JSON structure of the project.
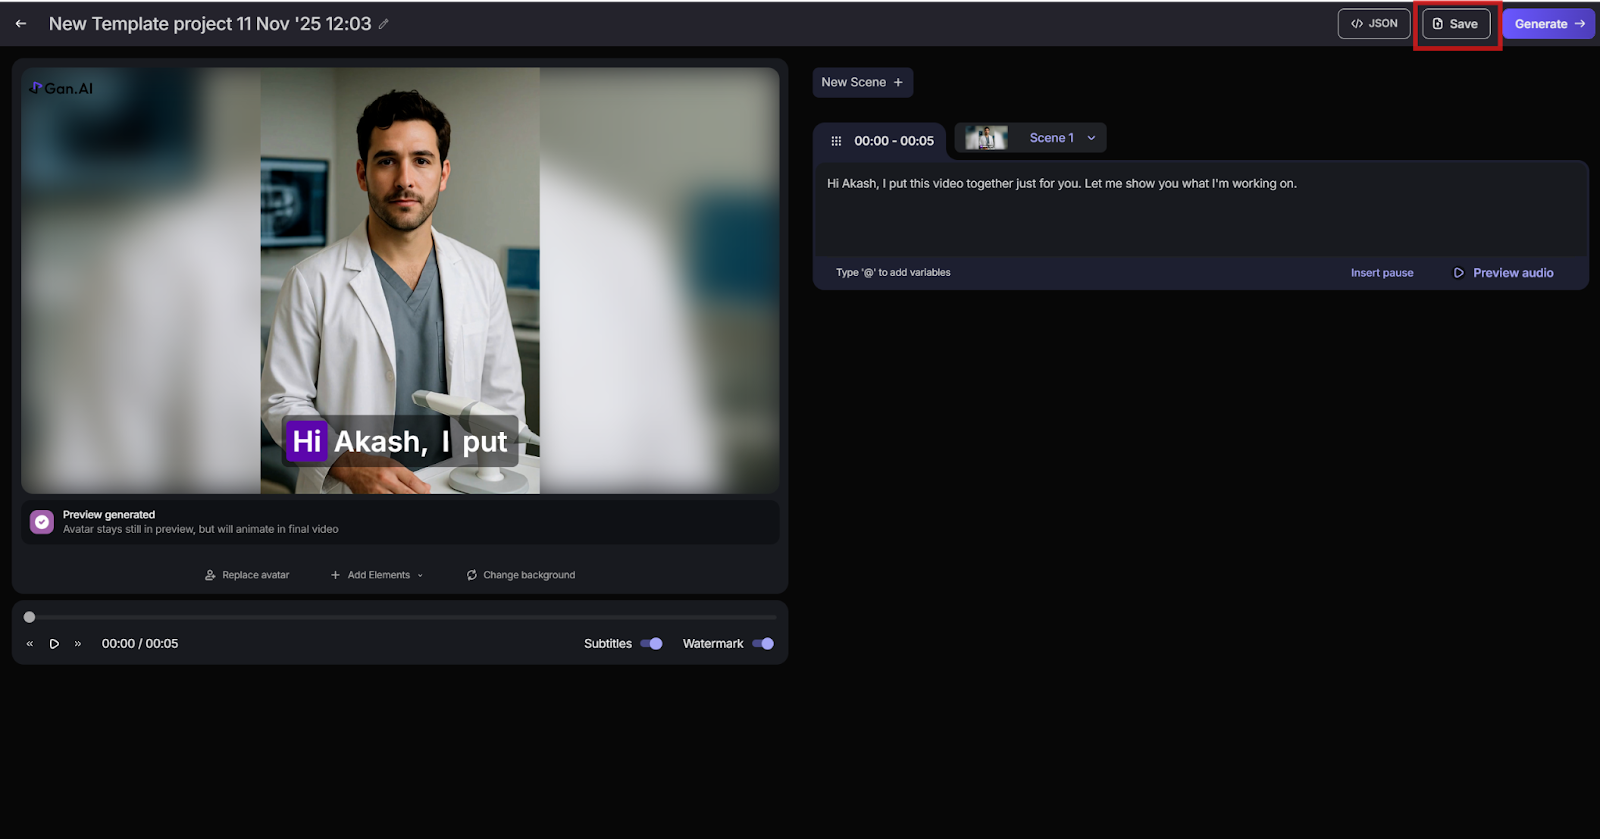
**Save Button:**
Located toward the top-right, beside “Generate.” Save ensures your edits are stored before rendering.
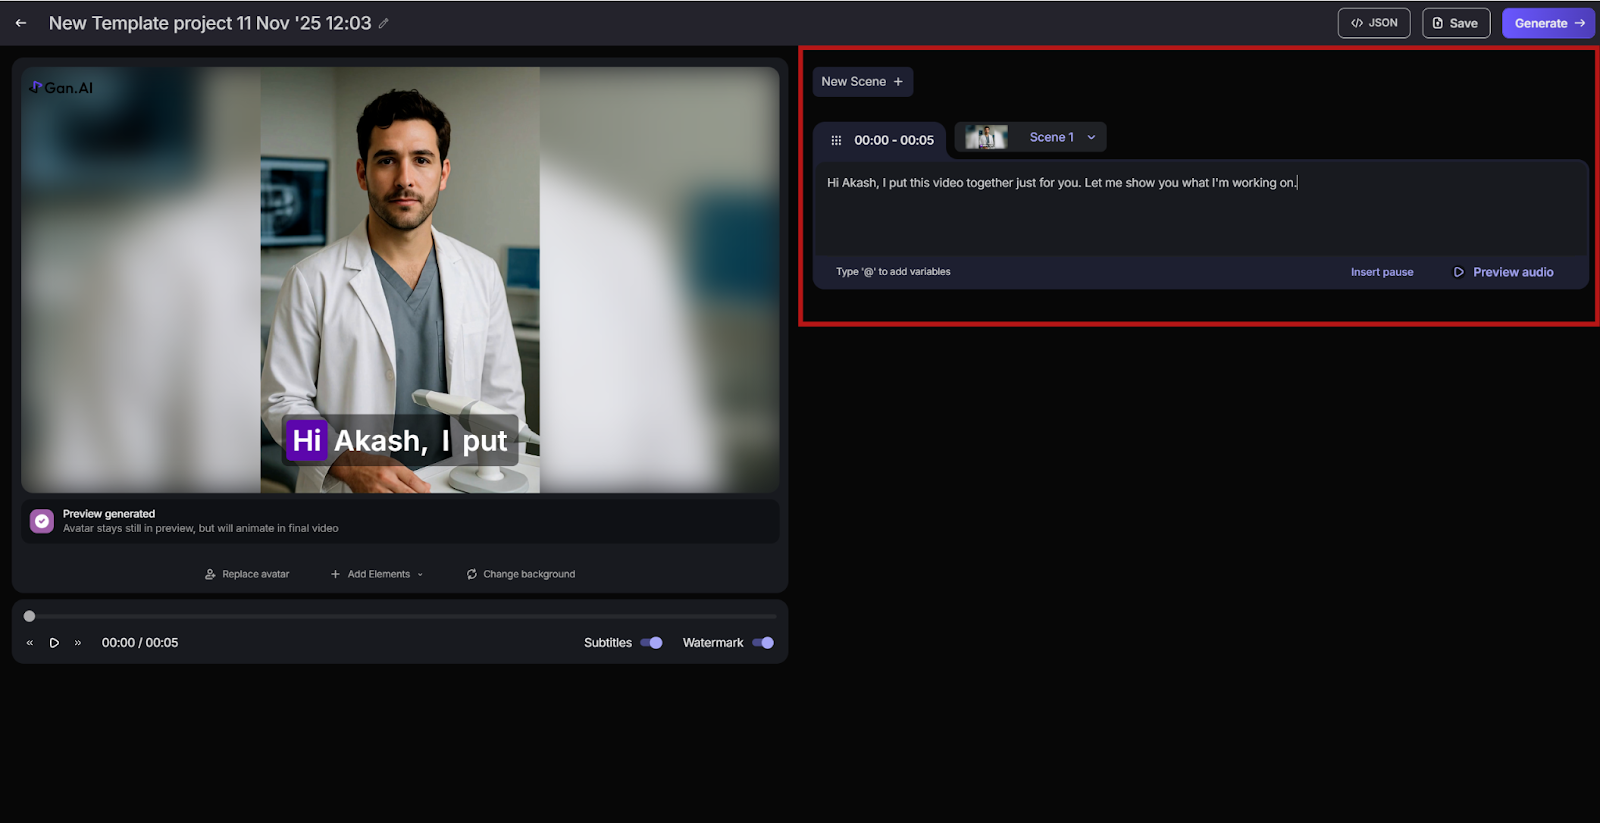
**Scene & Script Editor (Right Panel)**\
\
This section lets you write or edit the dialogue your avatar will speak. You can add new scenes, insert pauses, or preview audio. The editor supports multi-scene AI video creation where each scene has a separate script, making it ideal for longer or segmented video projects. By clicking on **Preview Audio,** one can hear the input script and its tone quality. If not satisfied, one can regenerate the audio.\
\
Type your message or narration in this box. The AI avatar uses this text to generate natural speech once rendered. You can personalize scripts using dynamic placeholders such as **@name** or **@company** for creating individualized videos at scale.
Use ‘**Insert Pause**’ to add natural breaks within your avatar’s speech, improving flow and realism. Click ‘Preview Audio’ to hear how the AI voice reads your text, allowing you to fine-tune tone, pronunciation, and pacing before rendering the complete video.
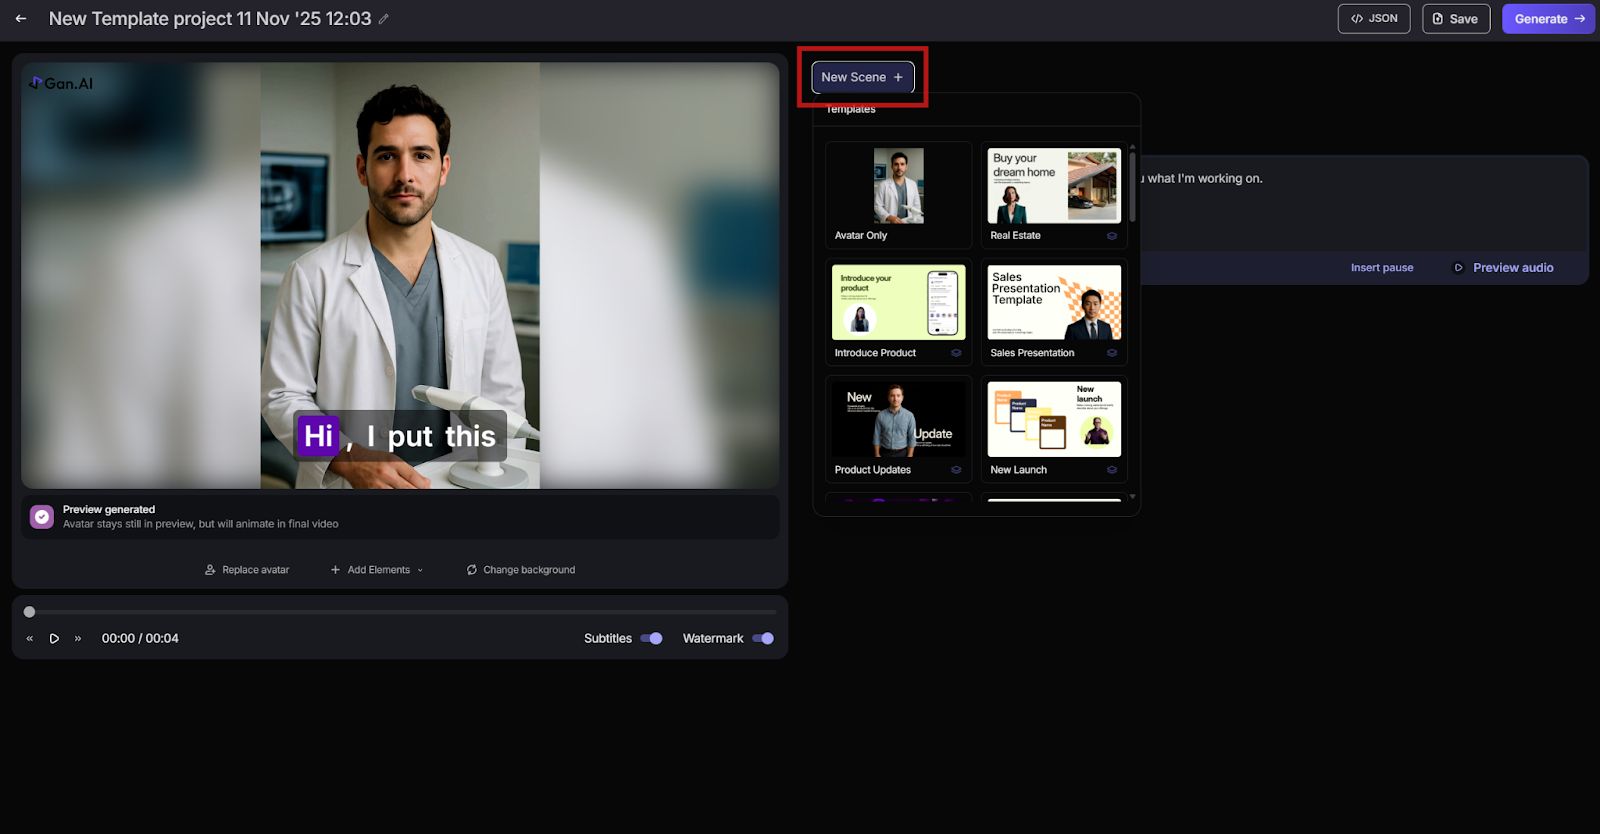
**New Scene (+) Button**
Found at the top of the script panel, this button adds a new scene. Each scene represents a separate segment of your video and can include different avatars, backgrounds, or messages. This is helpful when building structured training, storytelling, or multi-part promotional content.
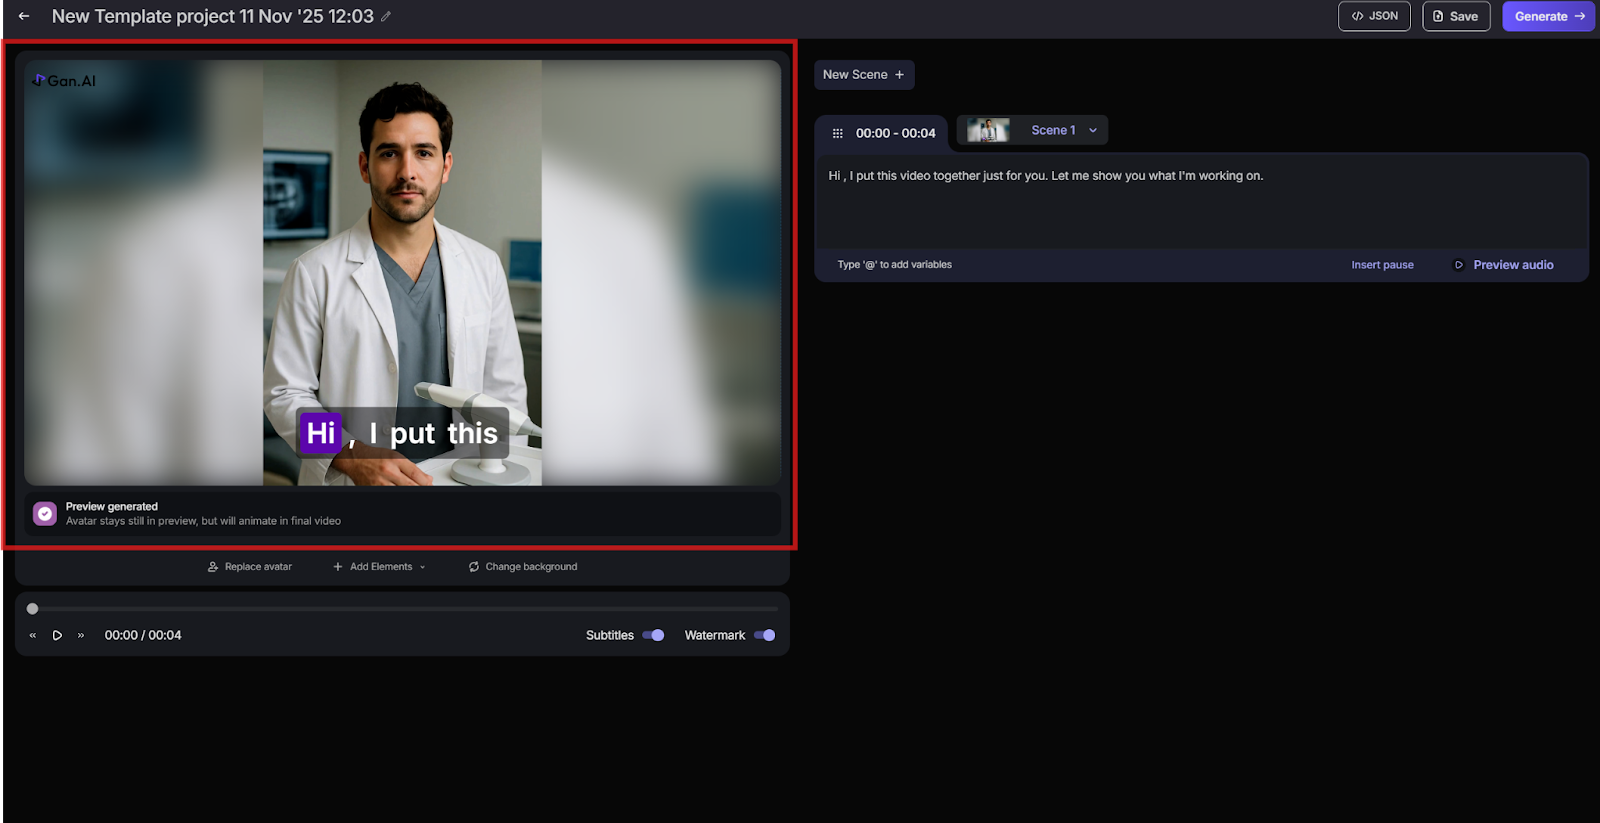
**Video Preview Window**
This is the main preview area where you can view your avatar’s setup, background, and subtitles. The avatar remains static in preview mode to improve performance. Movement and lip-syncing appear only in the final rendered video. Use this space to confirm visual alignment and branding.
**Edit Bar**
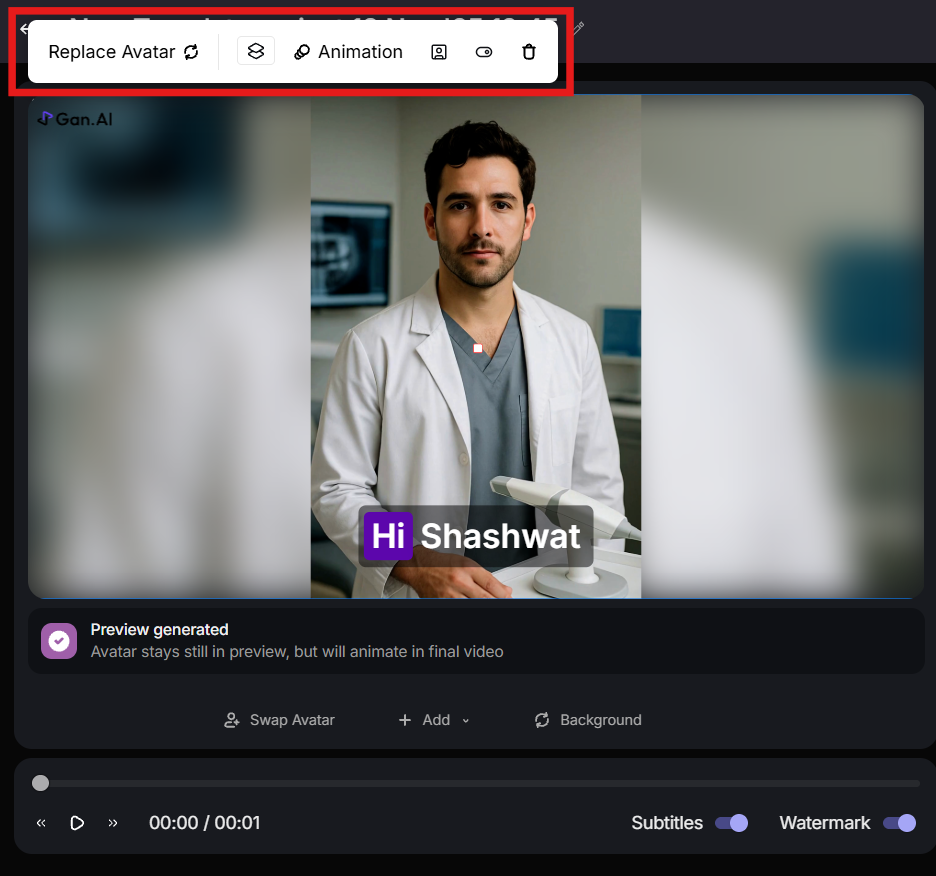
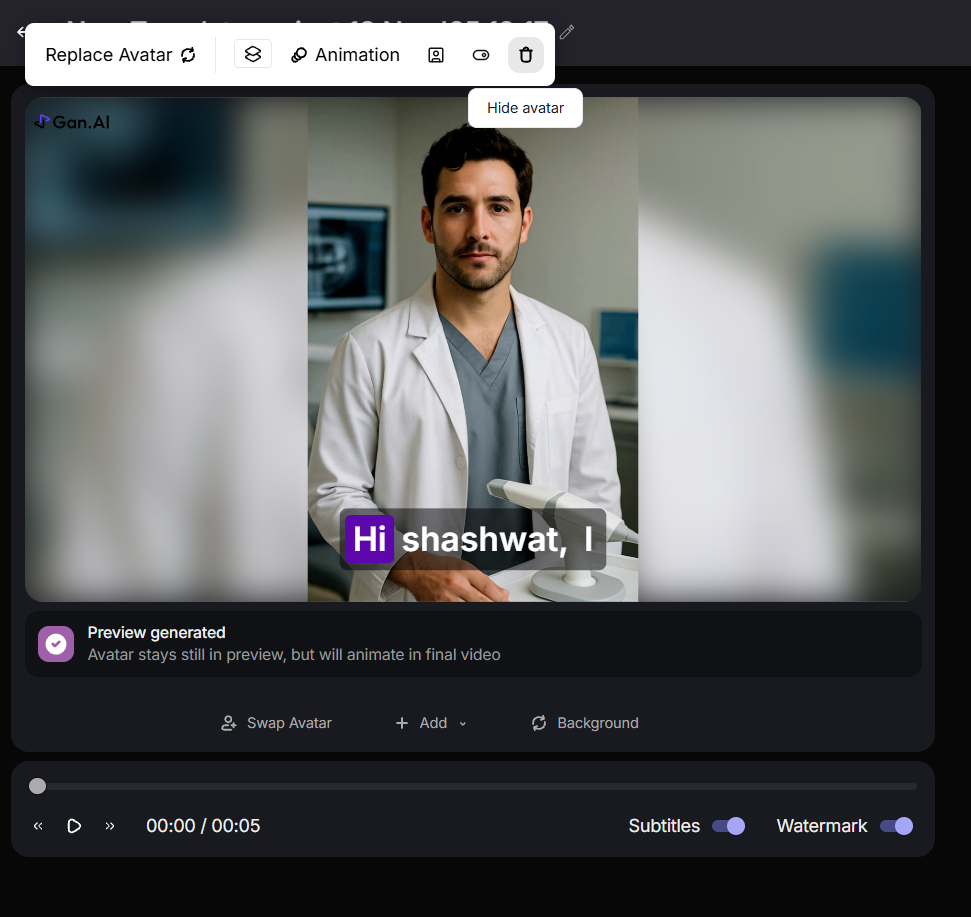
If you click on the avatar, an editing toolbar will appear at the top. From there, you can customize and edit your avatar settings.
**Replace Avatar Option**
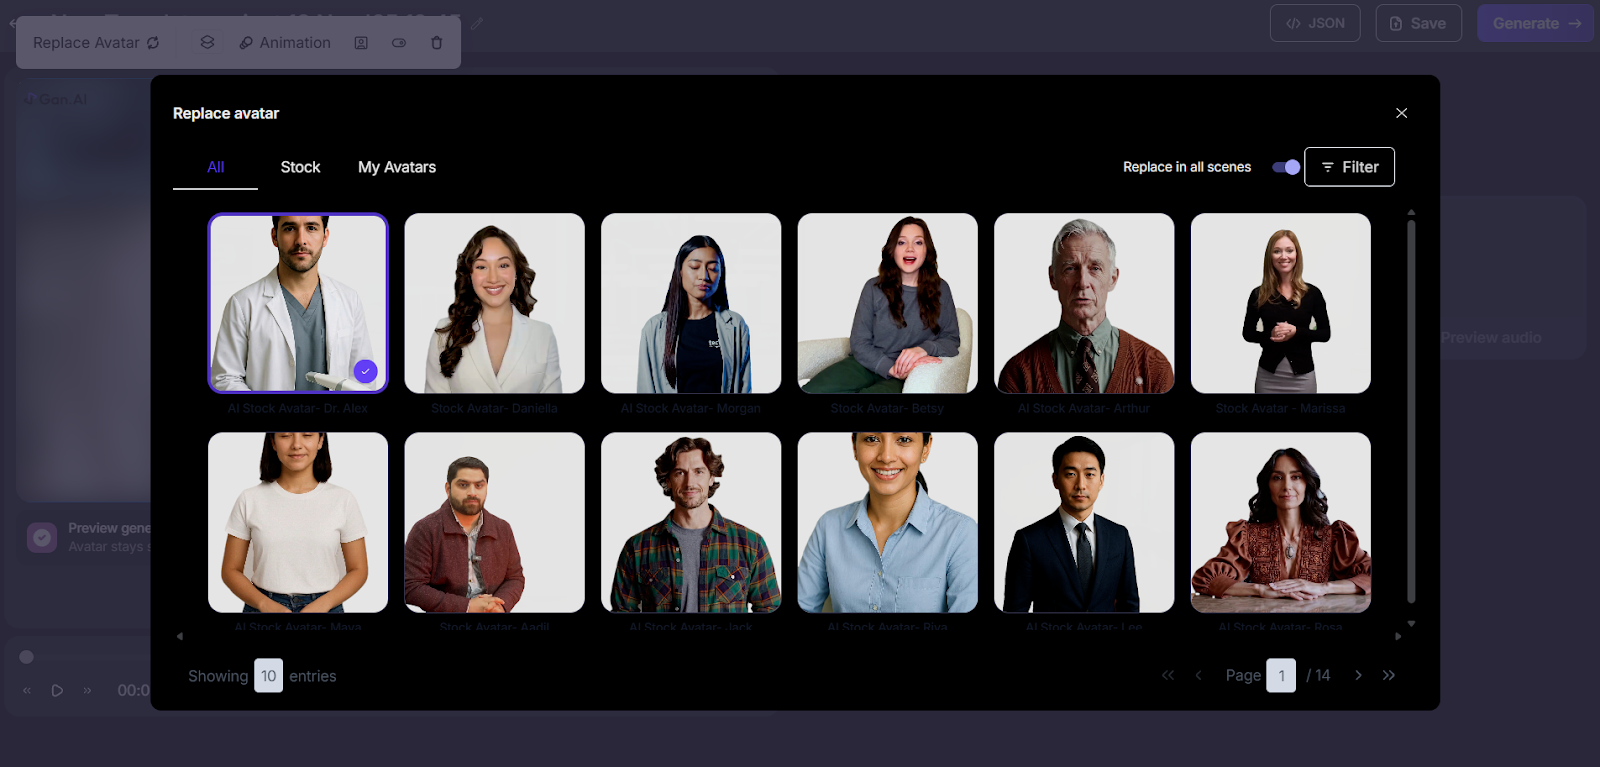
This button lets you change the avatar model. You can choose between custom avatars (created from real people) or stock avatars. It’s useful for testing different looks or tones that best match your message or campaign requirements.
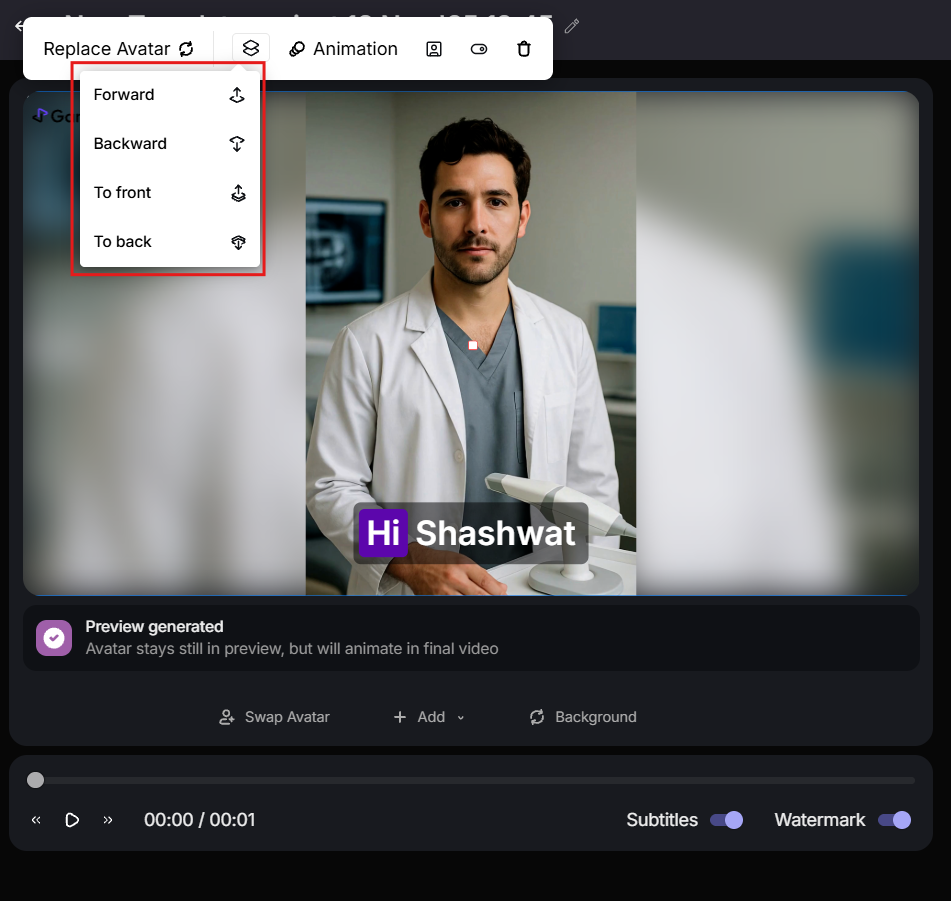
**Layer option**
Use the layer menu to change the order of elements by moving them forward, backward, to the front, or to the back.
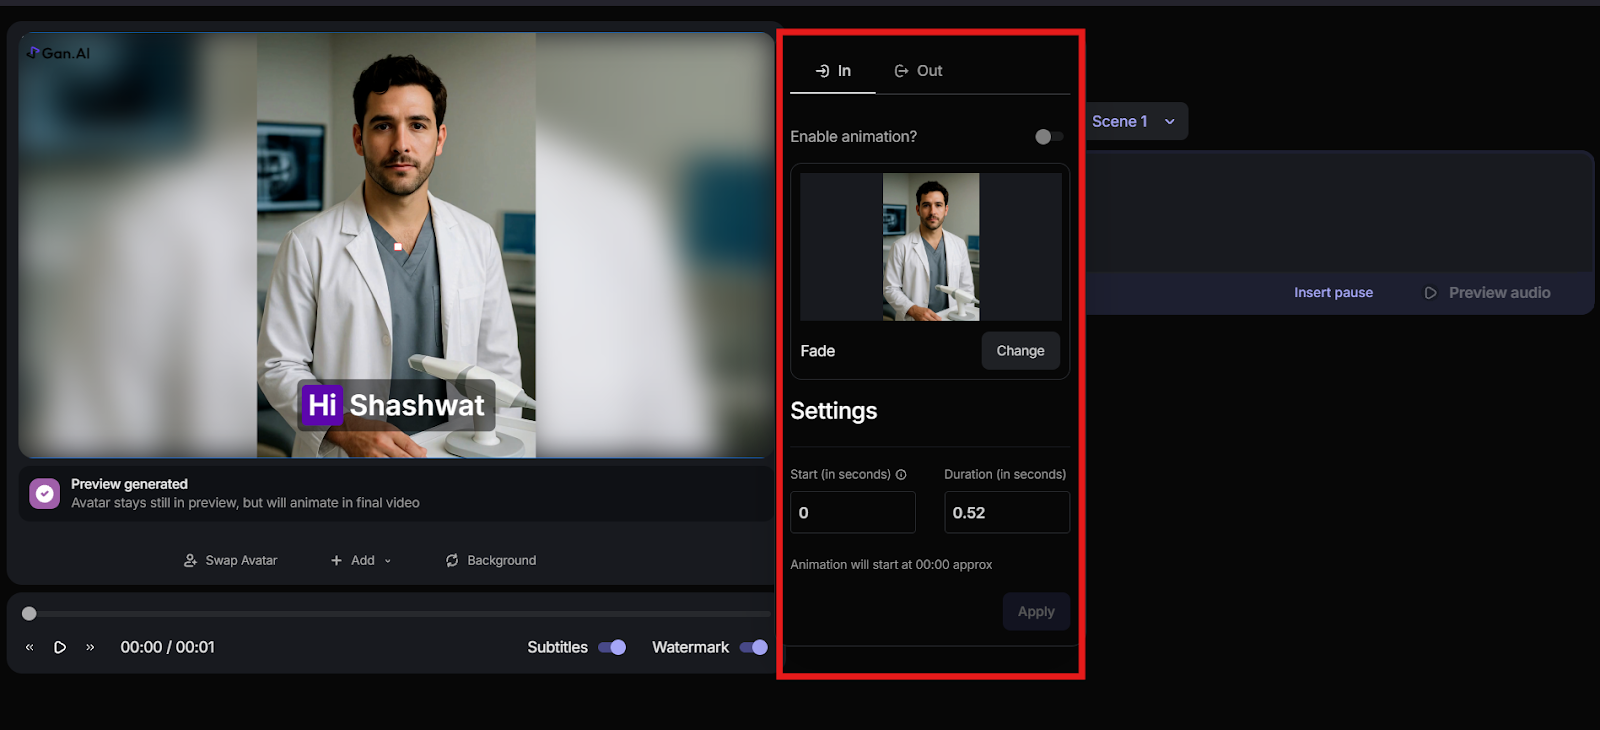
**Animation**
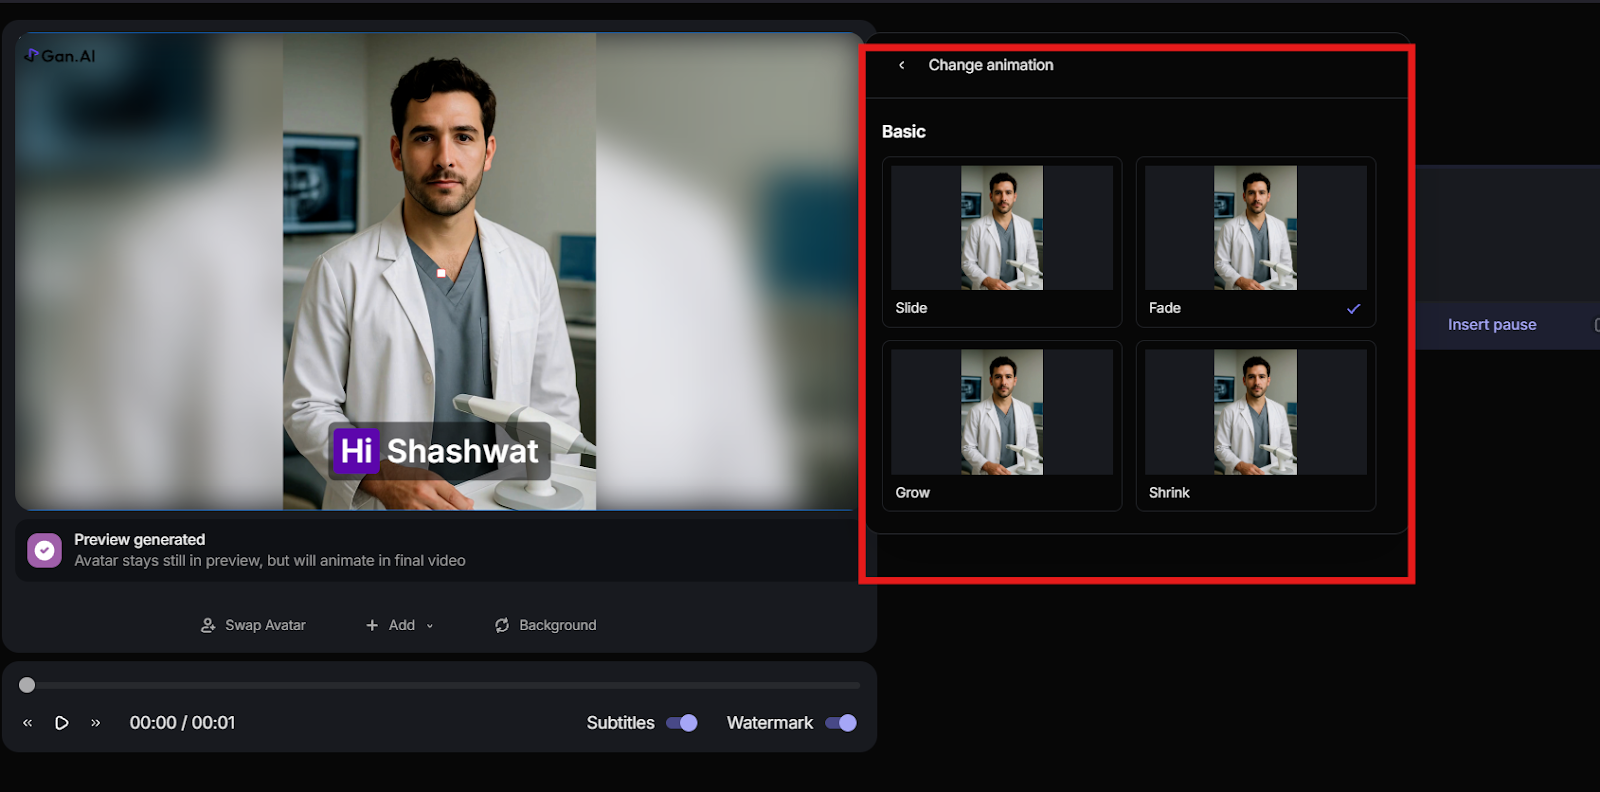
Click on Animation to apply different animations. The animation panel lets you enable entry (In) and exit (Out) animations for your avatar, and you can also customize start time and duration in seconds for precise timing.
Click on **Change** to select different animation styles like Fade, Grow, Shrink, or Slide.
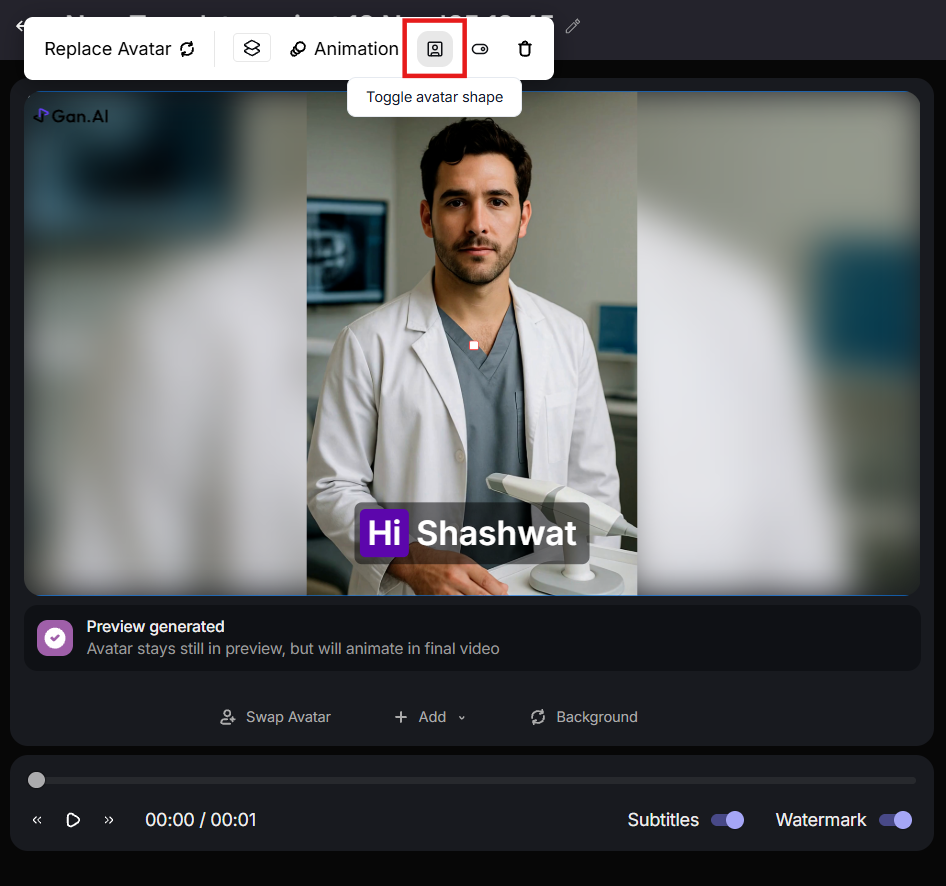
**Toggle Avatar Shape**
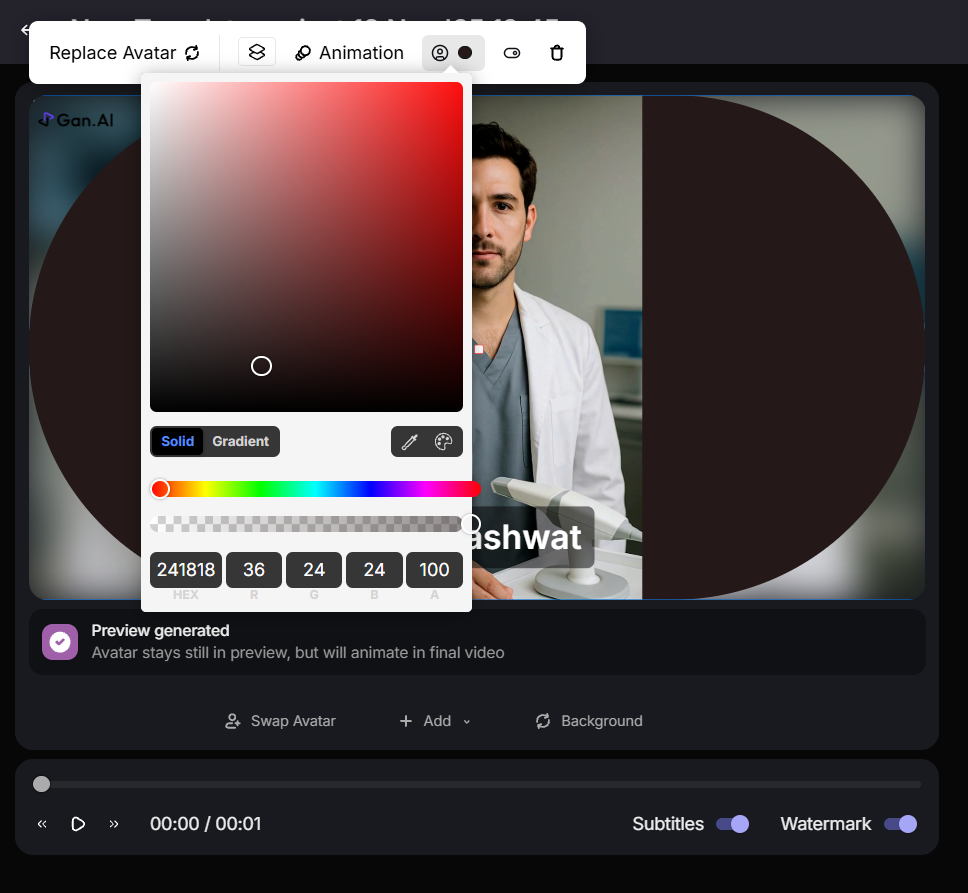
Turn on the Avatar Toggle to view and adjust the avatar’s shape.
You can also customize the background color behind the avatar toggle.
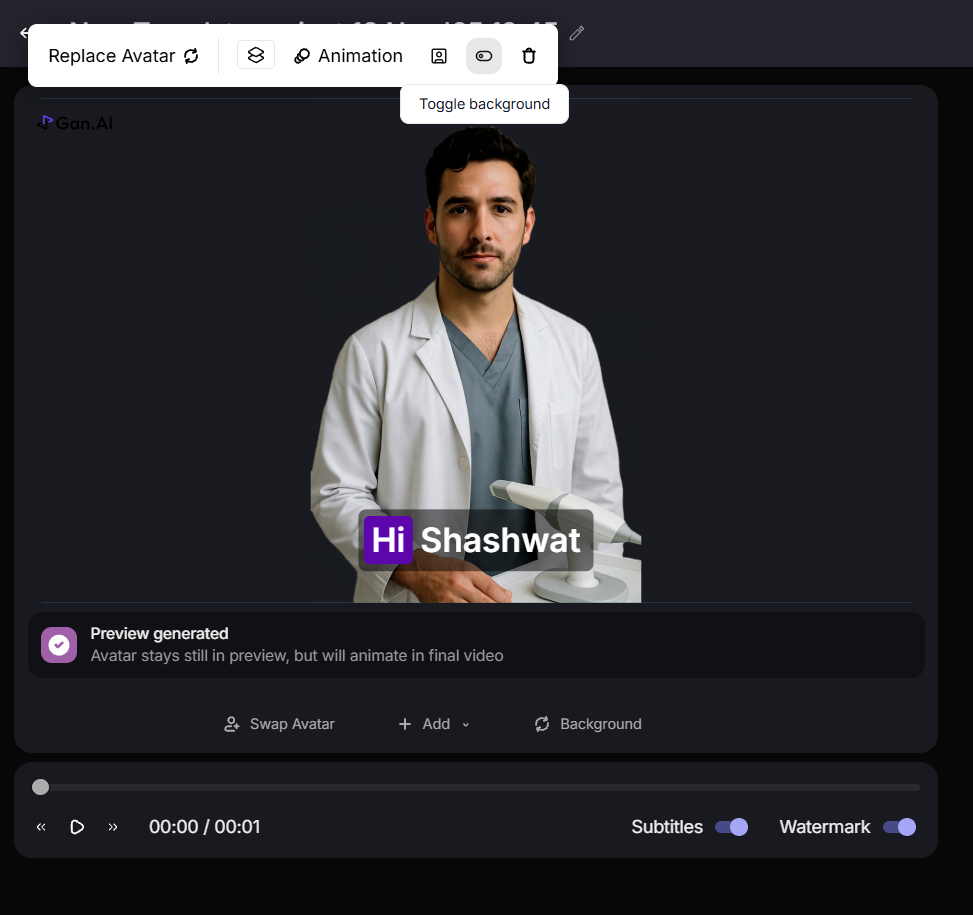
**Toggle Background**
Click on the Toggle Background option to turn the avatar’s background on or off.
**Hide Avatar**
Select Hide Avatar to remove the avatar from view.
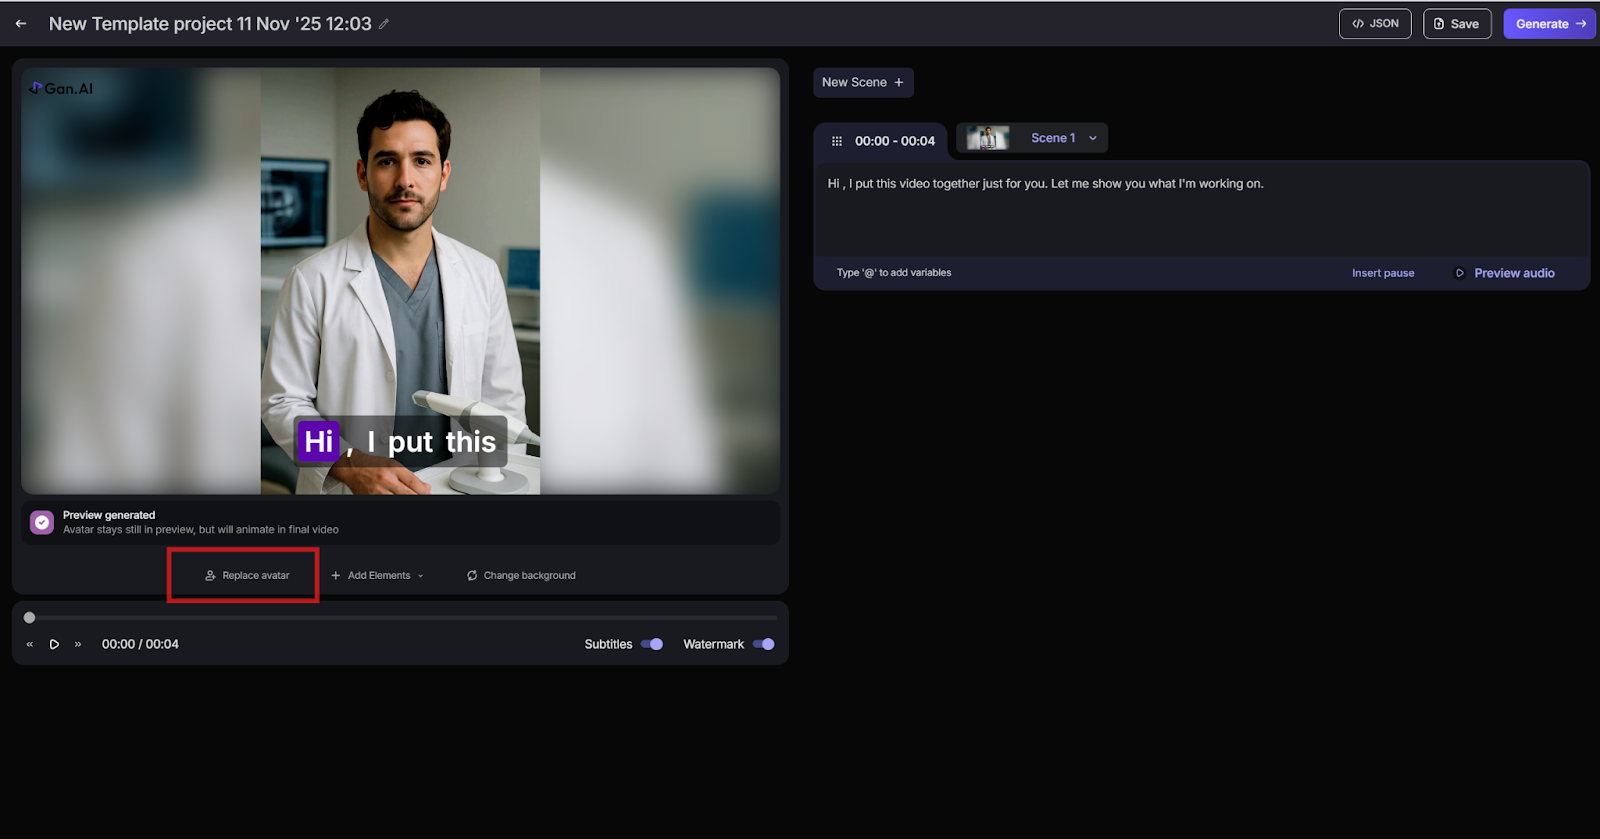
**Replace Avatar**
This button lets you change the avatar model. You can choose between custom avatars (created from real people) or stock avatars. It’s useful for testing different looks or tones that best match your message or campaign requirements.
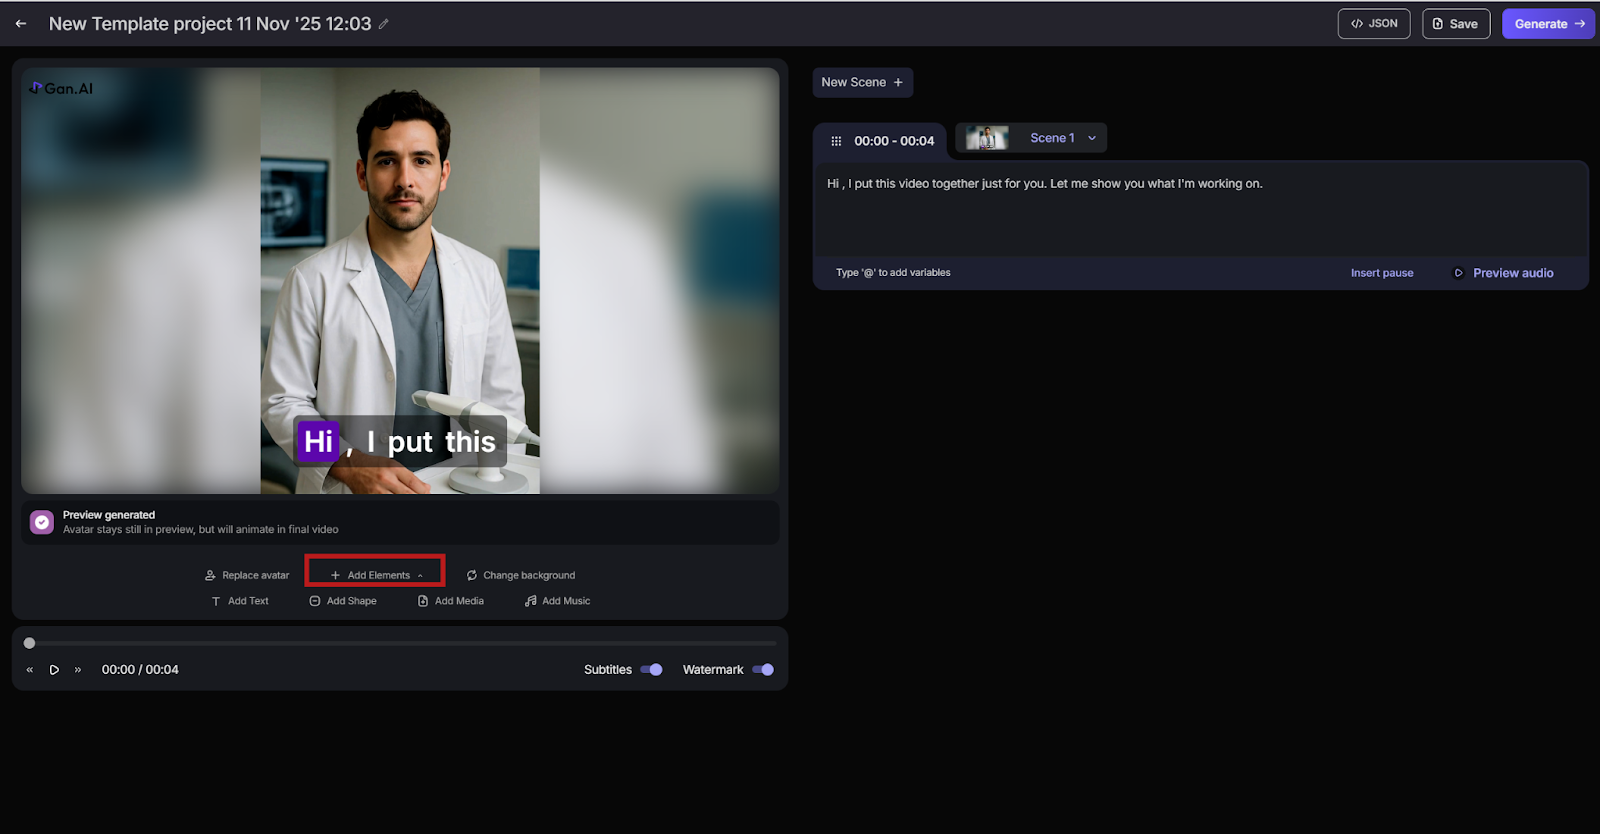
**Add Elements Button**
The Add Elements option in Gan.AI lets you enhance your video by adding visual and audio components directly to the scene. Located below the preview window, it allows you to insert text, shapes, logos, images, and background music to make videos more engaging and branded. Use it to highlight key messages or include brand assets. Keep elements balanced so your avatar remains the main focus, ensuring a clean, professional, and visually appealing final video.
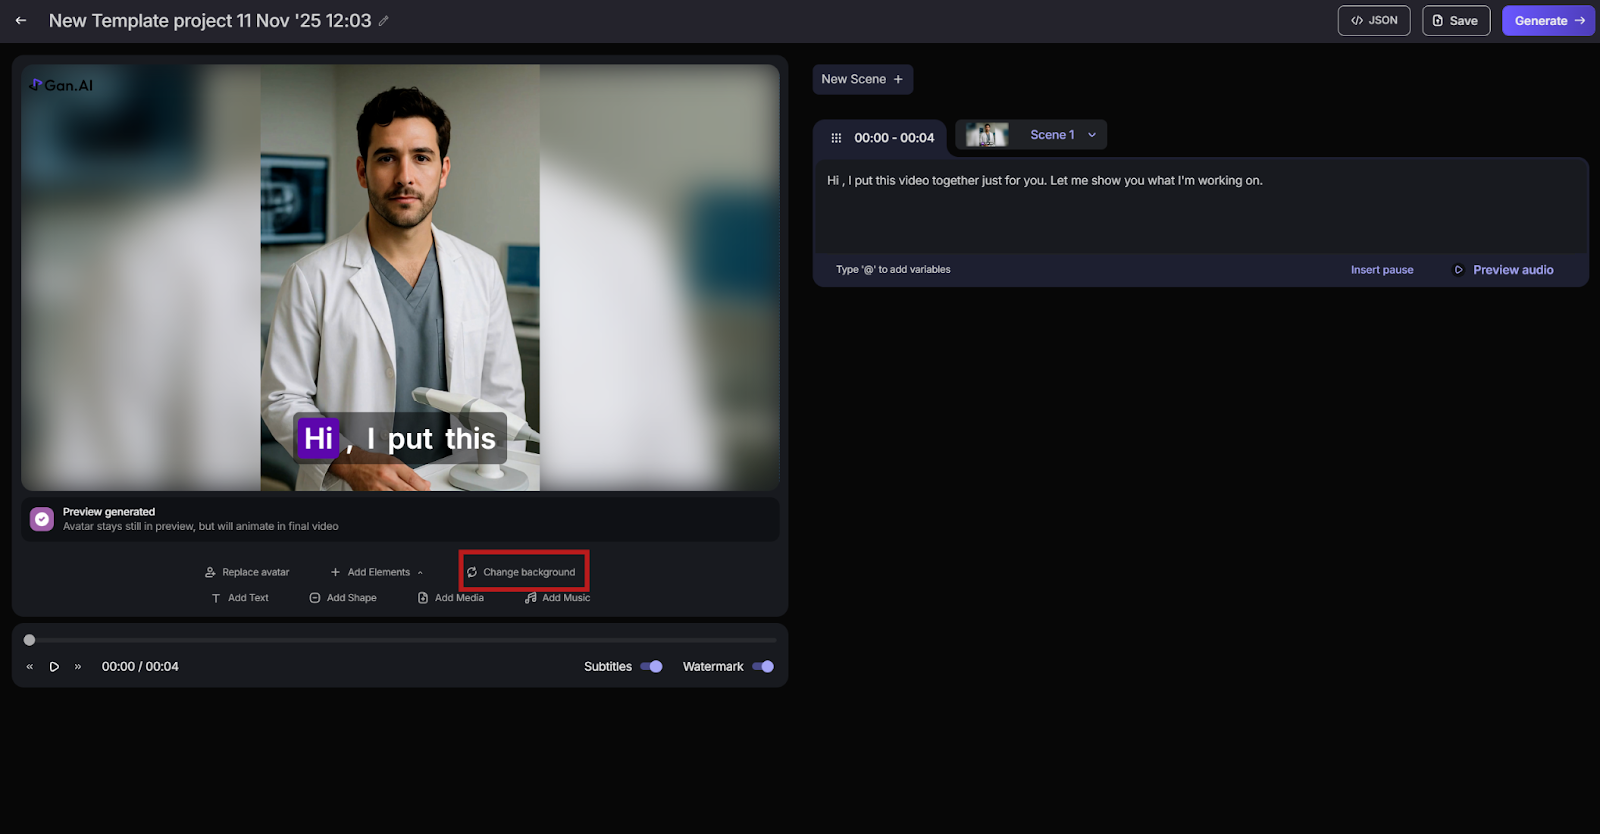
**Change Background Button**
This option allows you to switch your video background. You can use a plain color, an uploaded image, or even a video background. Matching your brand’s theme helps maintain consistency across campaigns and creates a polished, studio-quality presentation.
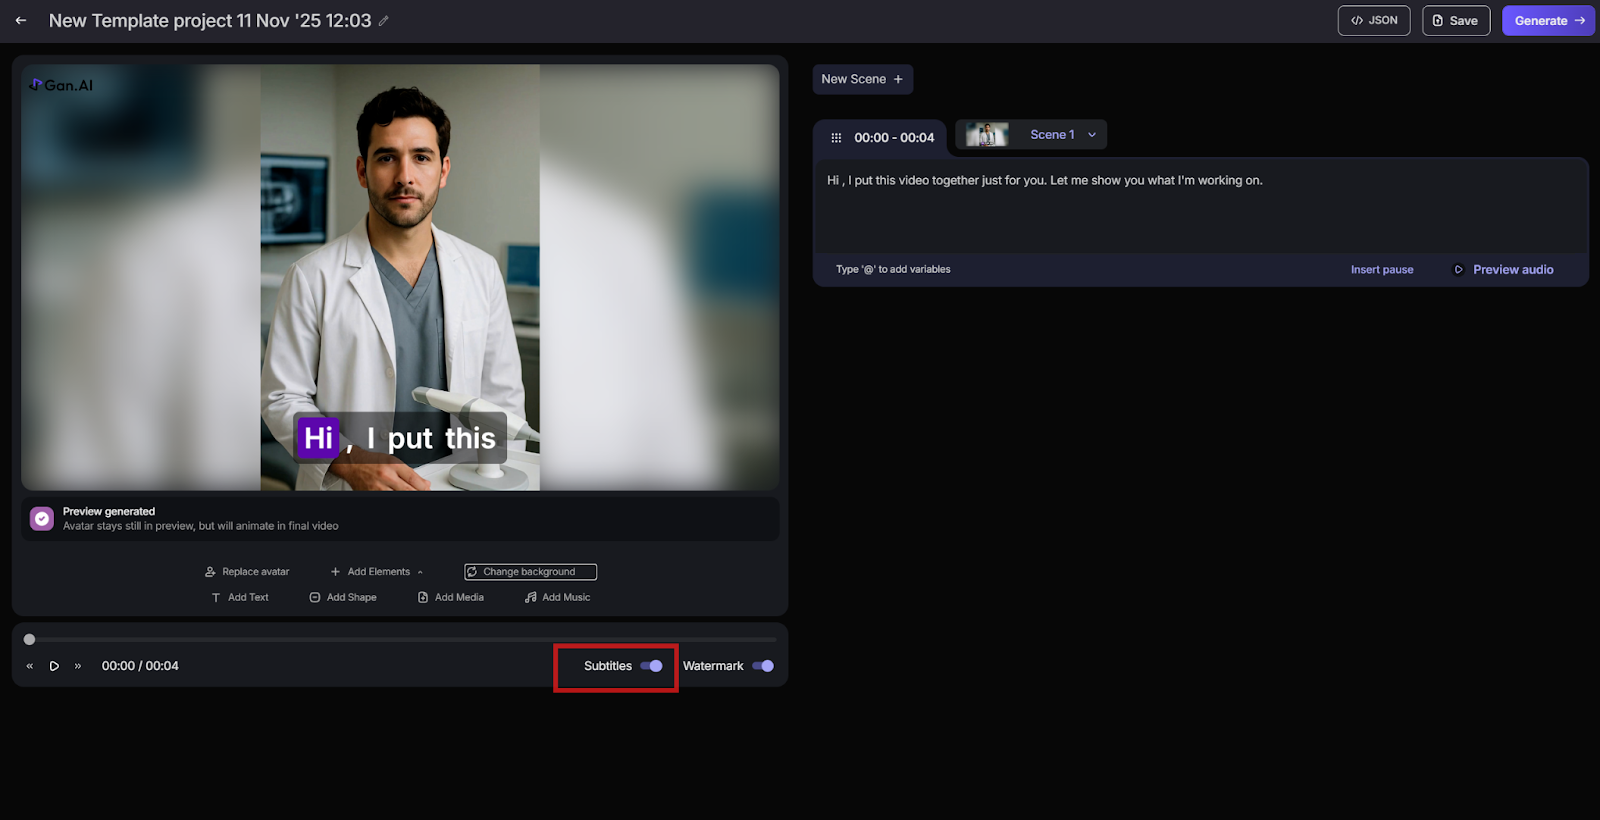
**Subtitle Toggle (Bottom Bar)**\
\
Enables or disables subtitles for your video. Subtitles are essential for accessibility and better viewer engagement, especially in multilingual or sound-off environments. Keep them on to make your message more inclusive and easy to follow.
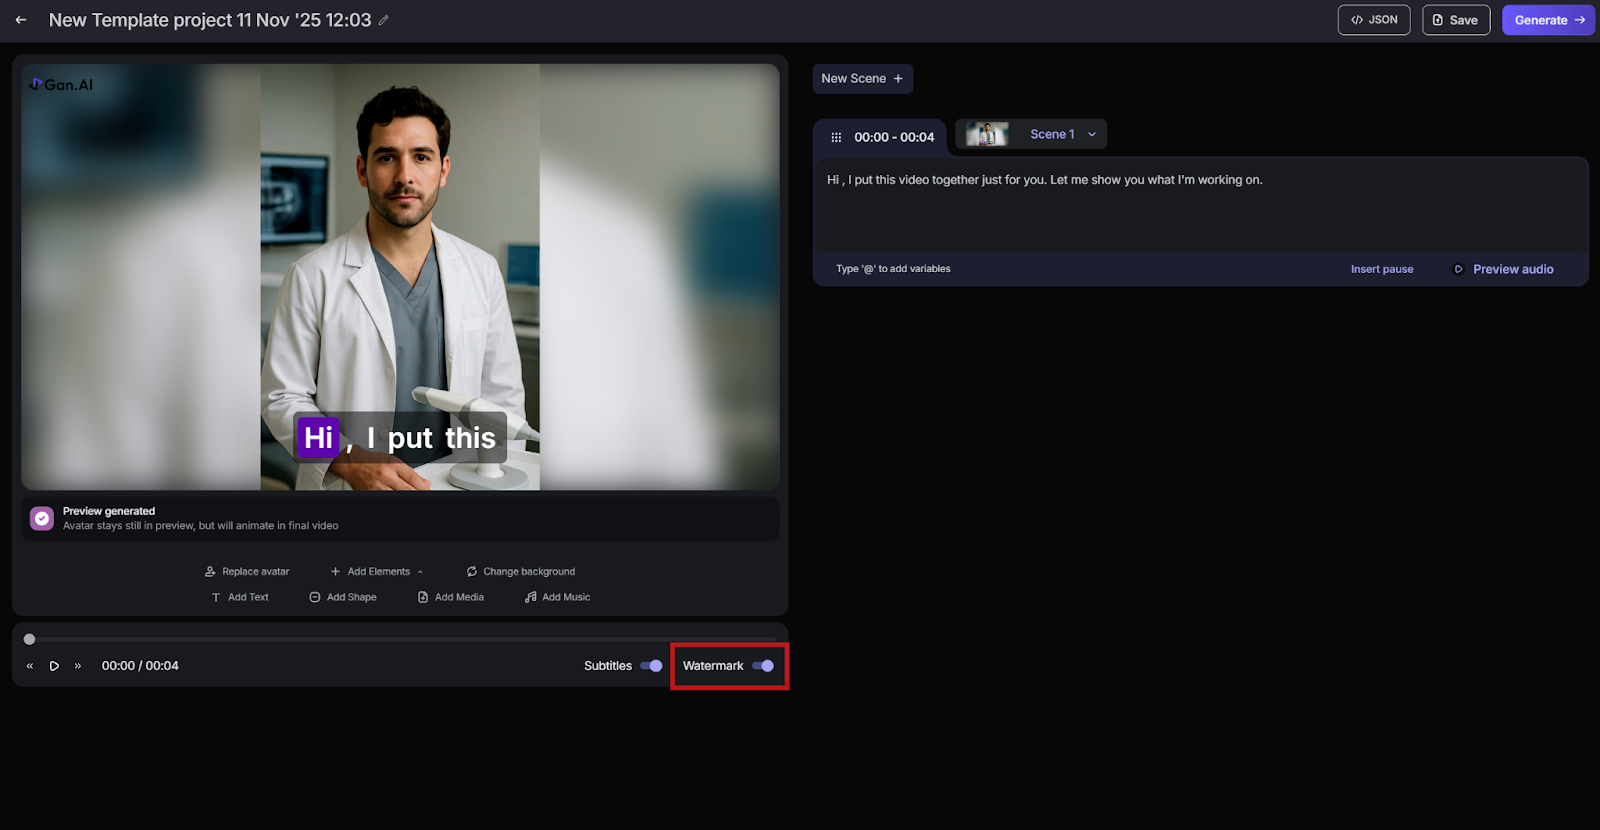
**Watermark Toggle (Bottom Bar)**
Let's you turn your brand watermark on or off. Watermarks protect your video from misuse and reinforce brand identity.
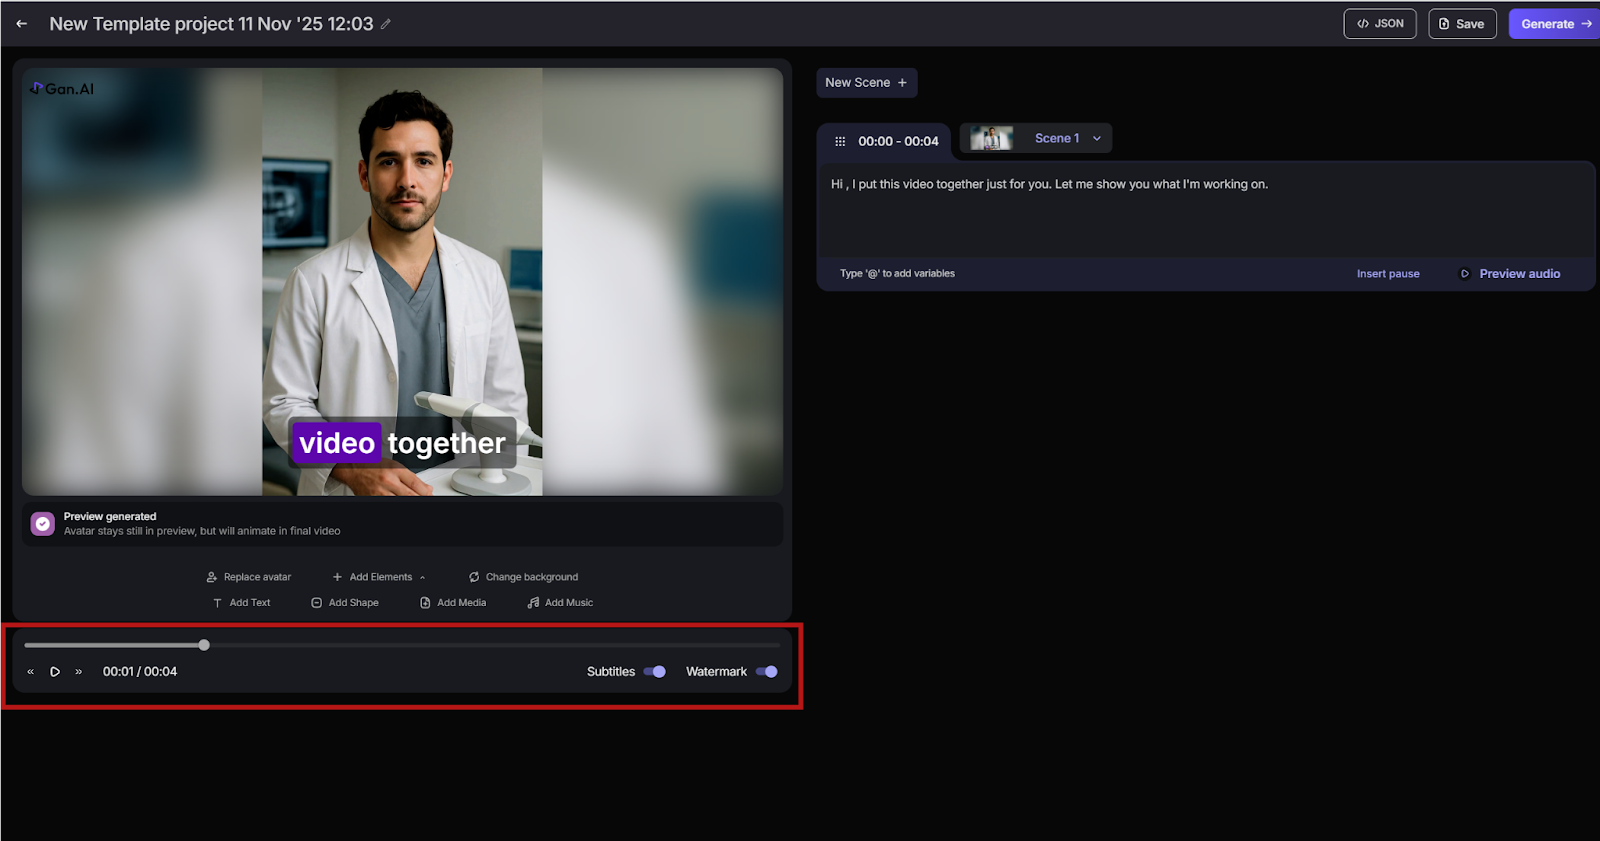
**Timeline Bar (Bottom Section)**
Displays the video’s duration and playback timeline. You can play, pause, or scrub through your video preview to review timing and flow. It’s useful for adjusting scene length, verifying transitions, and ensuring speech aligns smoothly with visuals.
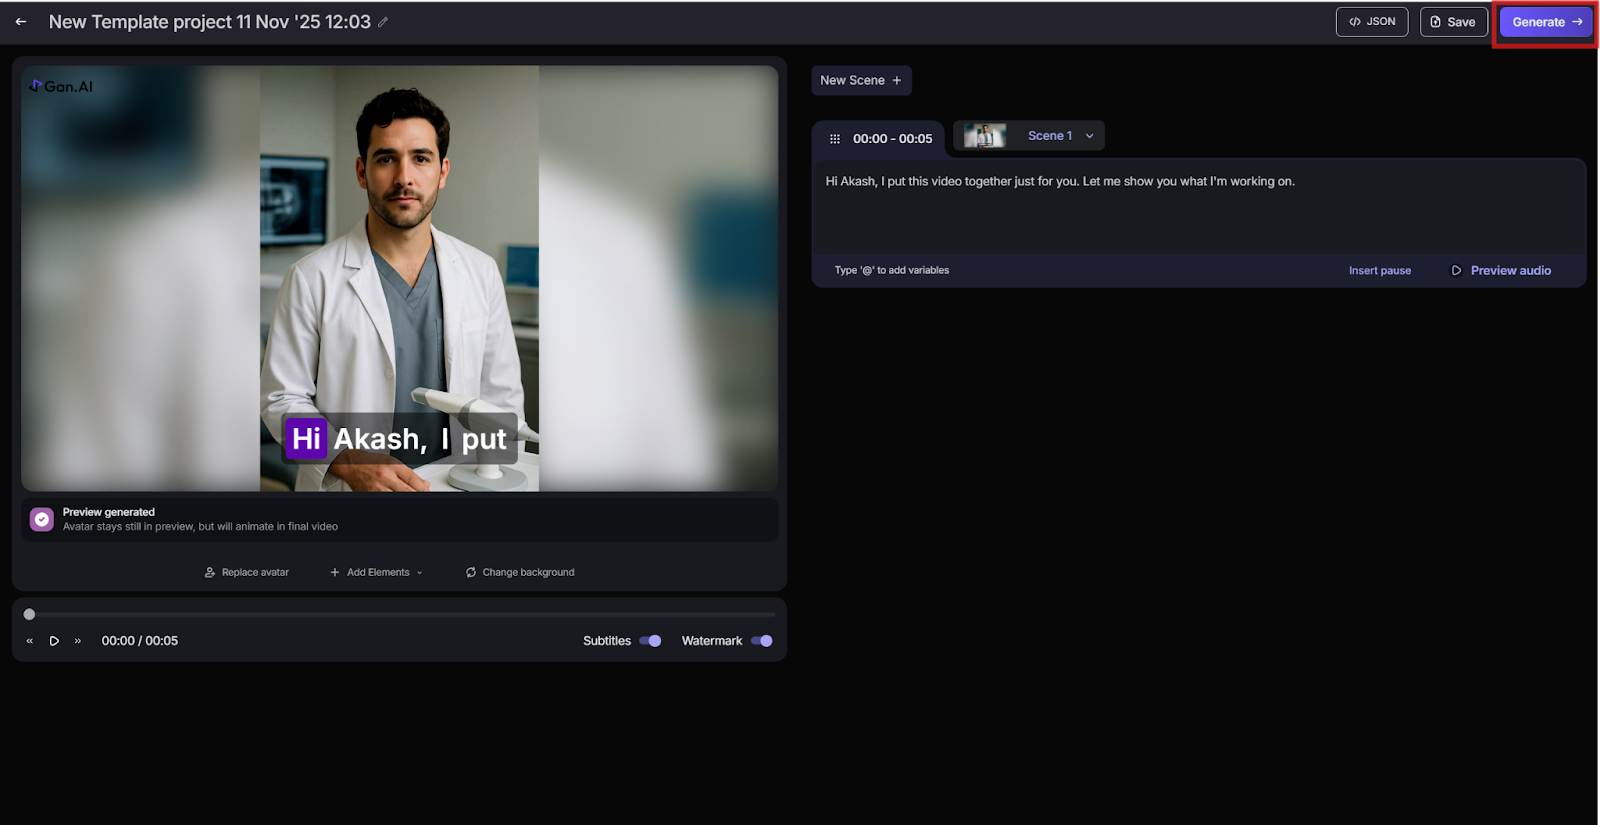
**Generate Button**
The Generate button is the final step in the Gan.AI Avatar creation process. When clicked, it starts rendering your video — converting the typed script into speech, syncing it with your selected avatar’s lip movements, expressions, background, and visuals.
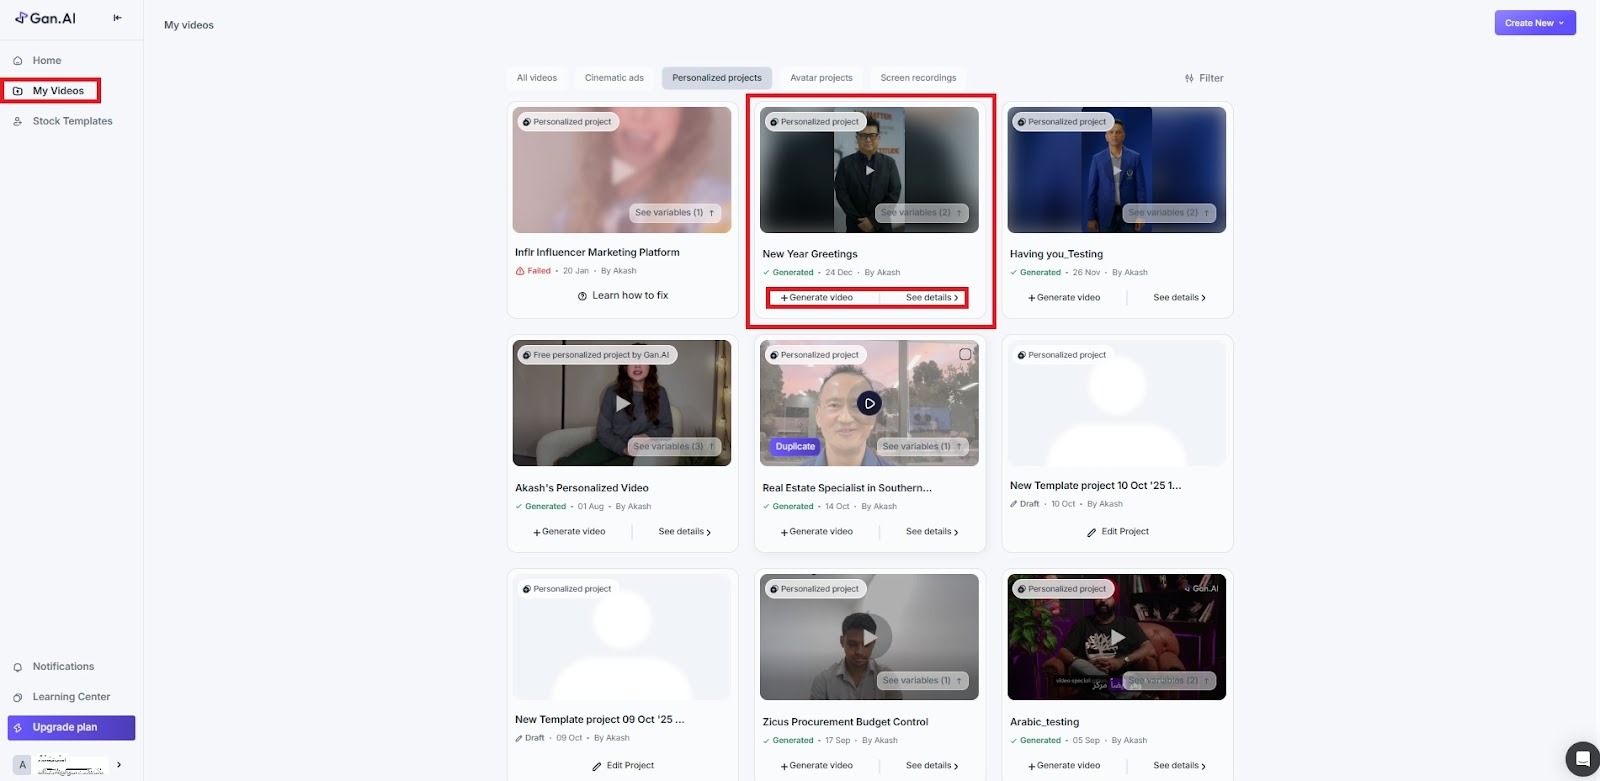
Once complete, the rendered video appears in your My Videos section for preview and download.
With Gan.AI’s AI Avatars, you have everything you need to turn simple scripts into compelling, human-like videos that scale effortlessly. From customizable scenes and animations to background options, branding tools, and precise audio controls, every feature is designed to help you create professional, polished content—without cameras, studios, or complex editing. Explore the editor, experiment with different avatars and elements, and watch your ideas come to life through truly lifelike digital storytellers.